
How to Backup Hyper-V Guests from the Hyper-V Host Server
Backing up guest virtual machines from the host server has several advantages. First, you get image-level backups of the entire virtual machine and you can restore that elsewhere. Virtual machine backups at the image level are, hence, self-contained. Second, it's much faster to back up a VM from the host because the host's CPU and hard drives are being used directly and there is no need to use virtualized access to hardware.
Note that using BackupChain's granular backup option for Hyper-V, you can also take file backups of files stored inside virtual machines from the host and without installing VM agent software.
Creating the Guest Backup Task
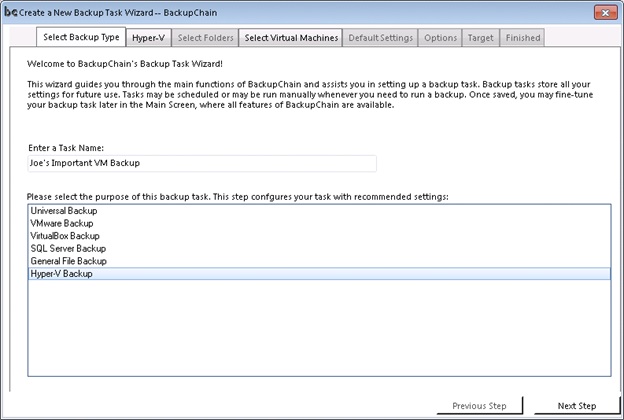
The first screen that appears after installing BackupChain (Server Core installation instructions may be found here), asks to you define a new task. All you need to do at this stage is choose a Hyper-V task type and select the guest machines you want backed up:
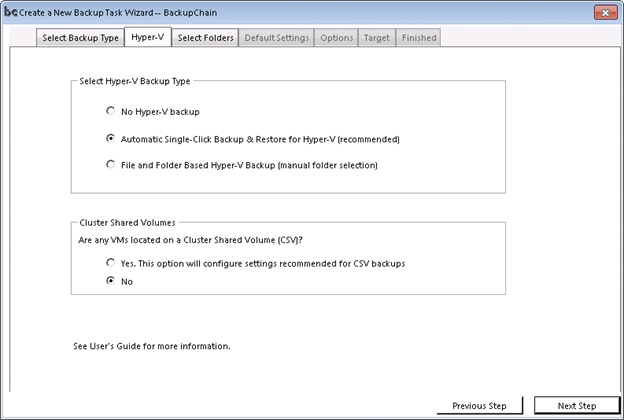
Selecting VM Guest Protection Method
In our example we proceed with the recommended configuration, Automatic Single-Click Backup & Restore:
Virtual Guest Machine Selection
Finally we select the virtual machine guest we want backed up:
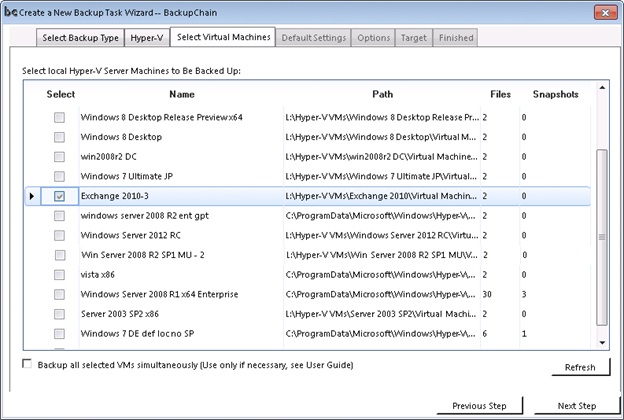
Note the 'simultaneous' option above. The simultaneous VM guest protection option should not be used in an attempt to shorten processing times, even though it may reduce the total processing time by a couple of minutes. The purpose of this option is to create multiple virtual machine backups that are consistent to one another, i.e. taken at the same exact point in time. This is useful when you have several databases servers stored in separate virtual machines.
Most users, however, are fine leaving the simultaneous option off. This will cause BackupChain to run guest virtual machine backups sequentially, i.e. one after the other. This is indeed the recommended way to back up your VMs because it dramatically reduces the load on your host server.
We now proceed with selecting a target folder.
Selecting the Target
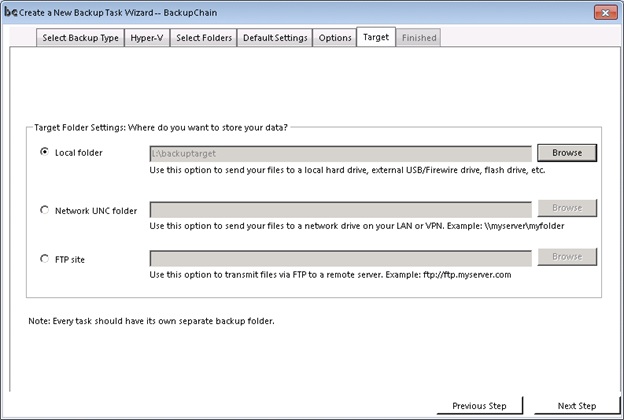
Above you may select a local drive as target, a network share, such as a NAS or UNC path, and FTP. Note that BackupChain is the only software on the market capable of backing up your virtual machines over FTP using deduplication, meaning that only changes inside the VHDs will be transmitted.
You can then proceed with Next Step and finish the task configuration. More details on advanced settings may be found in the current User Guide.
We hope you find BackupChain's Hyper-V backup solution useful and hope to have you on board soon.
All Steps are Shown Again in the Video Below
VM Live Backup Requirements
In order for live protection to be available in the guest VM:
1. You need to install the latest Integration Services. Look in your host's Windows folder for vmguest.iso and mount it in each VM.
2. Check you have the latest Windows updates on your host server installed.
3. Do not use snapshots because they are not recommended for production systems. If you do use snapshots, store them in the same folder as the main VHDs.
4. Avoid changing snapshot folders once you have created snapshots.
5. Note: when you delete snapshots, Hyper-V Management hides from the user interface but they are still in operation until the VM is shut down for a while. This is something Microsoft has fixed in Windows Server 2012
6. Ensure all VHDs / VHDXs have a basic disk partition layout. Live backup of VMs using dynamic disk partitioning is not yet supported by Microsoft's Integration Services.
7. Ensure NTFS is the format on all your disks throughout.
8. Up-to-date Integration Services are necessary to use live backup. Note that on some guest operating systems there is no live backup support.