Screenshots
BackupChain is an automatic, high-performance Windows Backup Solution with a sien/hyper-v-backup/ecialized to handle VHD, VMDK, and database backups for you.
Begin by setting up your first backup task using the Backup Wizard:
Backup Wizard
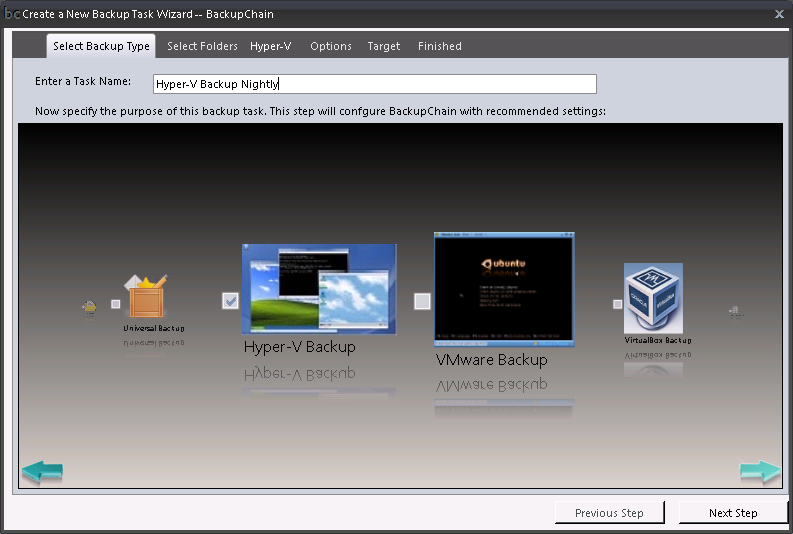
Select Universal Backup if you're not sure which type to use. Hyper-V, VMware, VirtualBox, and file backups are more efficient types for each respective service you want to back up.
Hyper-V Backup and Cluster Shared Volume Settings
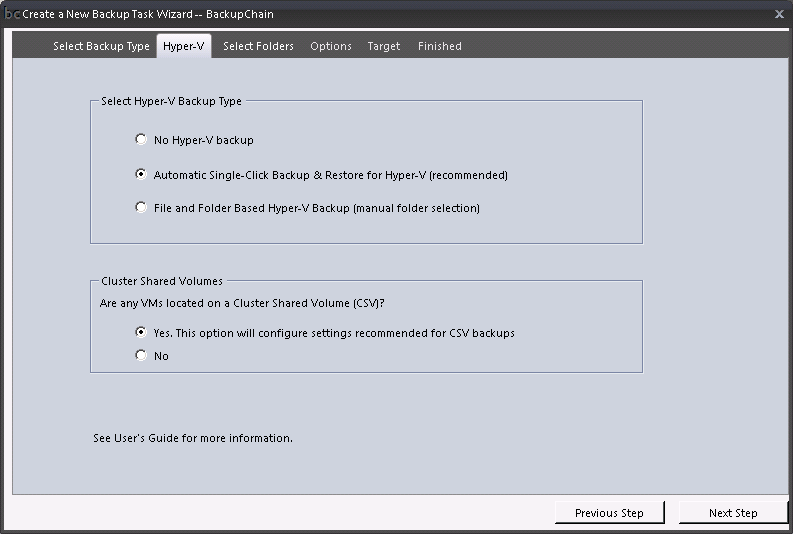
If you selected the Universal or Hyper-V Backup type, you can then select whether you want the Automatic Single-Click Backup & Restore option, or manual file and folder selection. Note that BackupChain is compatible with Cluster Shared Volumes and can preconfigure your task to run better on a CSV:
Virtual Machine Selection
If you select the Automatic Single-Click Backup & Restore option, the wizard will continue with the Virtual Machine Selection Screen:
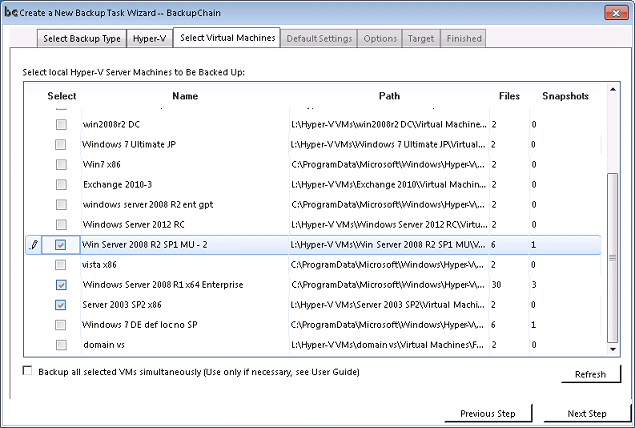
At this stage, all you need to do to finish your backup is to select the VMs you want backed up and then select a backup target.
Selecting Files and Folders
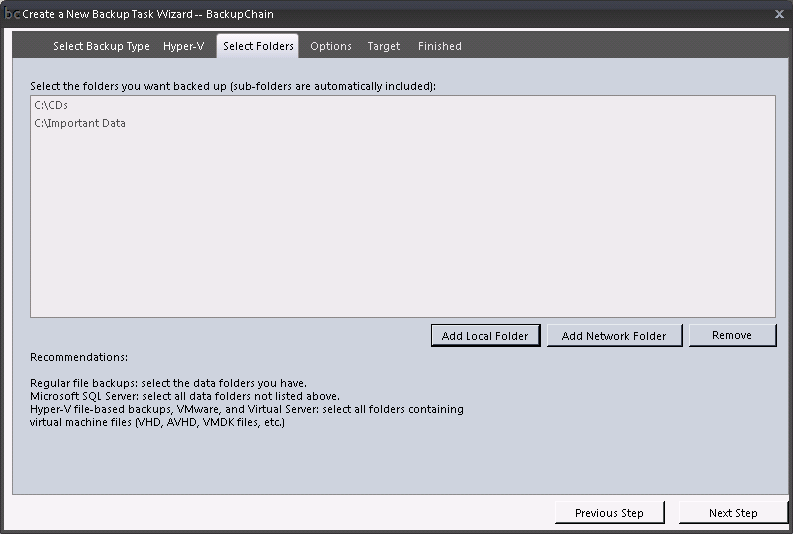
To back up files and folders, click "Add Local Folder" and select the folders you need. You may also leave this screen blank and move on. Individual files may be selected in the Main Screen below.
Main Screen
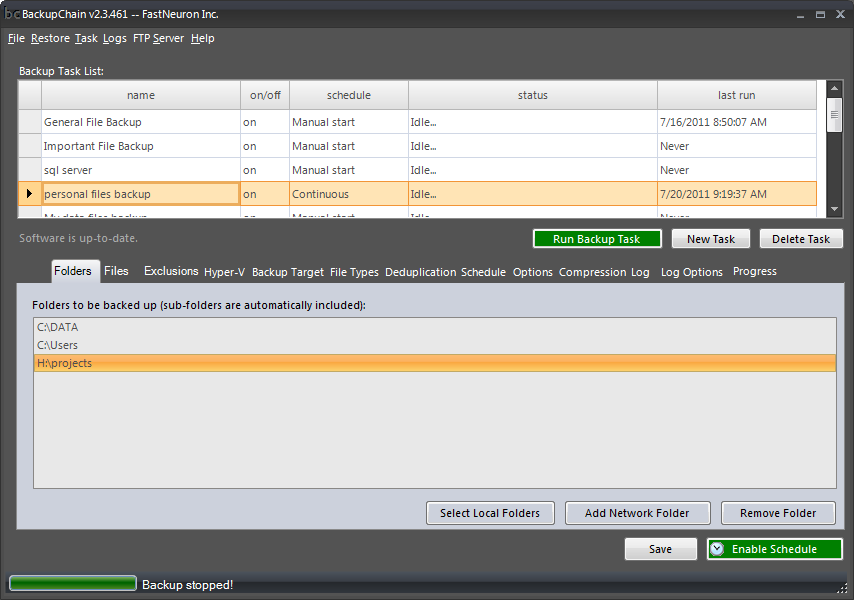
You can quickly check on each task and compare settings between tasks by selecting a row in the task list. All advanced task settings are available via the Main Screen's tabs (Folders, Files, Exclusions, etc.):
Backup Target Selection
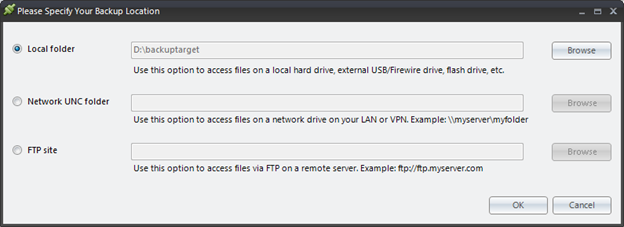
Selecting your backup target is simple. Choose between local or external hard drive, FTP/FTPS, and network shared folders (NAS / SAN) and enter the connection details:
Advanced File Types Configuration
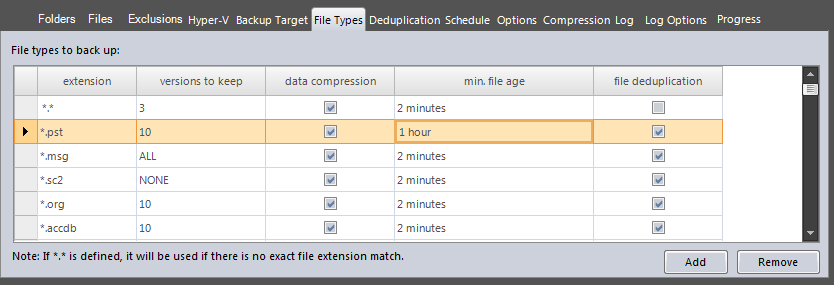
The File Types table is preconfigured with recommended settings; however, you may want to fine-tune these depending on your setting.
One of the strengths of BackupChain is to provide options to the user. In the File Types tab you can specify exactly how you want files backed up, depending on file type:
The above example means the following:
* We want all files (*.*) backed up using data compression but we don't want file deduplication. We want to keep only three file revisions in our backup store. The *.* setting is a catch-all, the lowest setting that applies if no other setting is configured.
* For *.pst files (Outlook), we want to keep up to ten versions of the file, we want it compressed and deduplicated. Note that we don't want the file backed up more often than every hour. In case the backup task runs every 15 minutes, we'll only get one backup per hour.
The minimum file age determines the time that needs to pass since the last change to a file before BackupChain backs it up.
* For *.msg files we want all files to be kept indefinitely in the backup store.
*.sc2 files are excluded from the backup by setting 'versions to keep' to None.
File Deduplication
Another major component in BackupChain is the file deduplication feature. It allows incremental and differential deduplication (delta compression) to be applied on a file-by-file basis. The preconfigured settings may be used as-is or fine-tuned to match your particular setting:

Advanced Scheduler
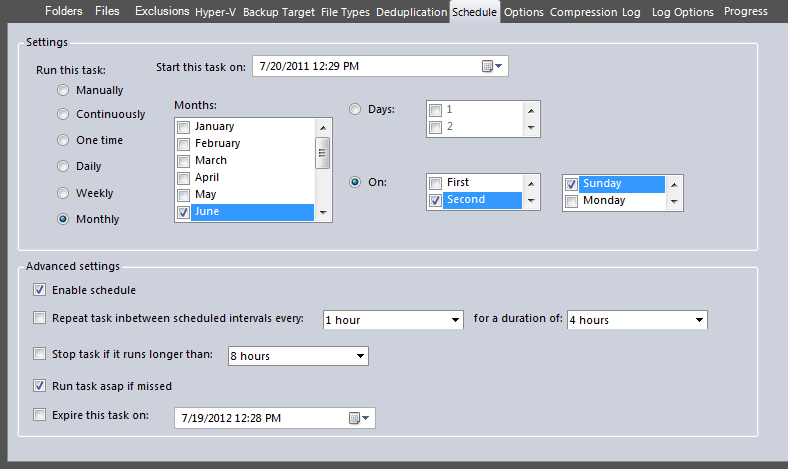
BackupChain is equipped with an advanced backup task scheduler. You can configure complex schedules as well as simple task repetition (select 'Continuously' for Continuous data protection) in the same screen:
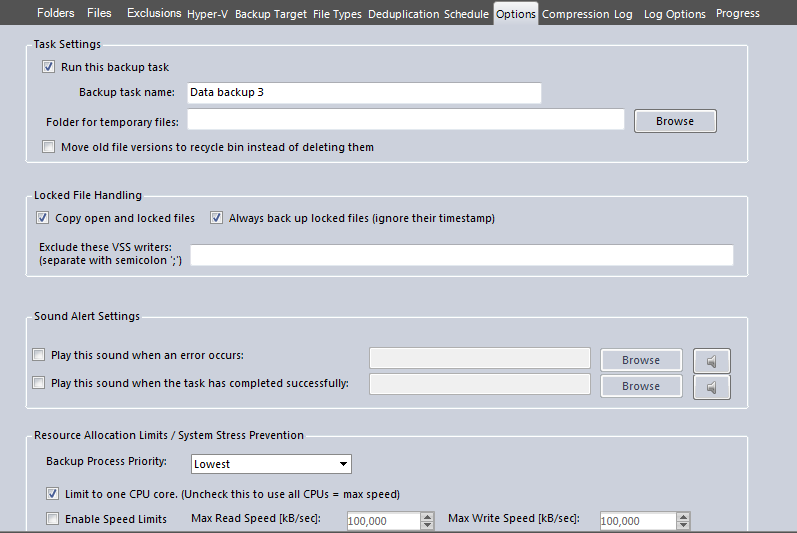
Select Options
Various configurations may be specified in the Options tab, such as Locked File Handling, Sound Alerts, CPU core and speed limitations, and external utilities. Note: Email notifications are configured in the Log Options tab.
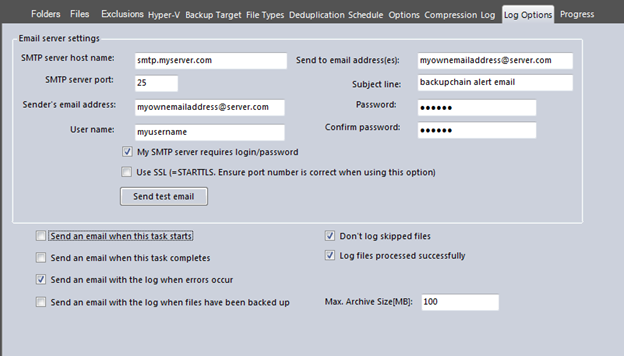
Log Options
In the Log Options tab you can configure email settings, and advanced logging and notification settings.
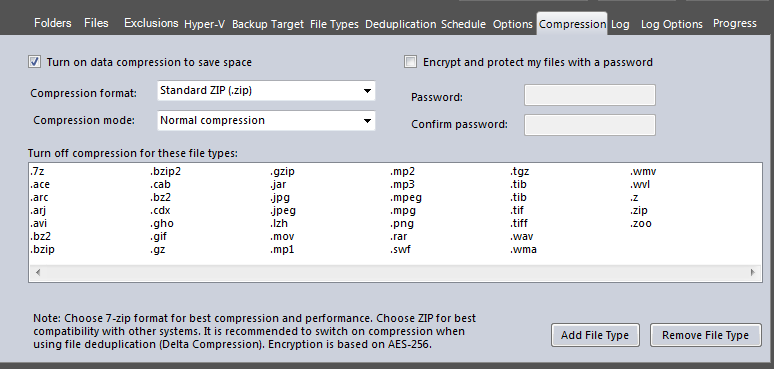
Compression Settings
The nice thing about BackupChain is you are in full control of your data. If you don't like proprietary file format--the BackupChain doesn't like them either--you can configure your backup to create standard ZIP, 7-Zip, .GZ, or other open standard formats. You can also switch off completely compression to obtain a backup of your files in their original format. The military-strength encryption used in BackupChain is based on AES 256 and is FIPS and HIPAA compliant.
Advanced Logging
The advanced log function lets you know exactly what has been backed up and how:
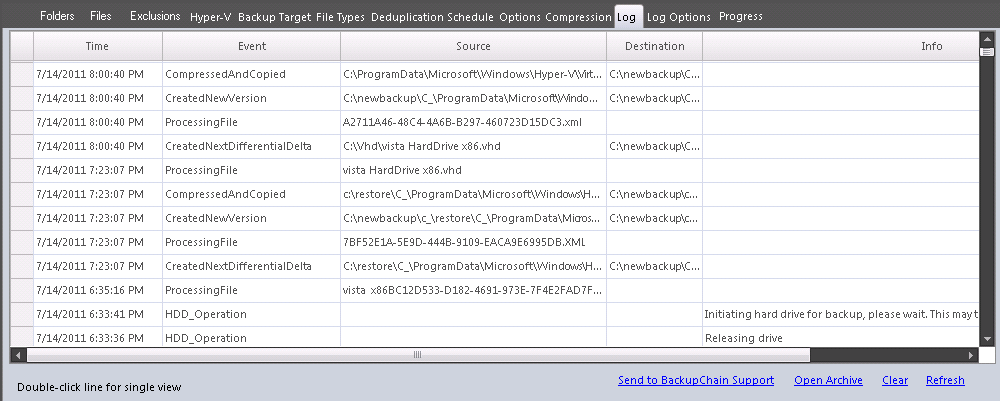
Note: the "Send to BackupChain Support" link at the bottom allows you to send your logs to the BackupChain team for review in case you need assistance.
Restoring Files
Restoring files easily is just as simple as backing them up.
Say you want to restore an older version of an individual file. You open the Restore Screen from BackupChain's menu, then select the folder or FTP server where you files are stored. Navigate the tree to the left. In our example, we want the file Ubuntu Desktop.VMDK dated April 26, 2011:
As soon as you select the file Ubuntu Desktop.vmdk at the top right, a new table appears at the bottom with all available versions of that file.
Note that the savings of incremental deduplication are substantial: While the first backup was 19.95 GB large, the following backups were only 14 KB and 8.87 MB! Depending on the actual change inside the file, a couple of MB may be sufficient to back up a 20 GB file.
BackupChain Time Machine Backup Feature
Going back in time, see previous screen (Restoring Files), is quite simple and economic with BackupChain. Select the two dates at the top to filter your files by date:

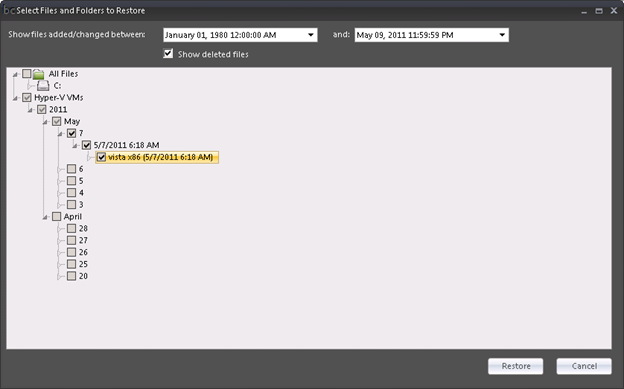
Restoring Hyper-V Virtual Machine Backups
The following screen shows how to restore a Hyper-V virtual machine backup. Navigate the tree to the left by date, select the VMs you want restored, and click "Restore". The restore process will then restore your virtual machine including snapshots and add your VM automatically to the Hyper-V Management Screen.
More Information
The best thing to do is convince yourself and download BackupChain. The installation includes a User Guide and full support for the fully functional trial version are available.
Download the latest version now:

