

VMware Virtual Machine Backup and Restore Step-by-Step
For detailed product information, please visit the BackupChain home page.
BackupChain performs live virtual machine backups of VMware hosts running on top of Microsoft Windows, such as VMware Server and VMware Workstation. At the moment ESX and ESXi are not supported. You can back up ESX virtual machines from inside the VM using a sector-level disk backup (see respective chapter).
For product information please check our VMware backup solution.
Important: In order to generate live virtual machine backups, BackupChain needs to run on the host computer. Another option is to run BackupChain within the virtual machine where you can run file-level backups as well as sector-level full disk backups. The steps below are illustrating backups taken from the host. To take backups inside, check the sections on sector-level disk backup and general file backup.
Backup of VMware Virtual Machines
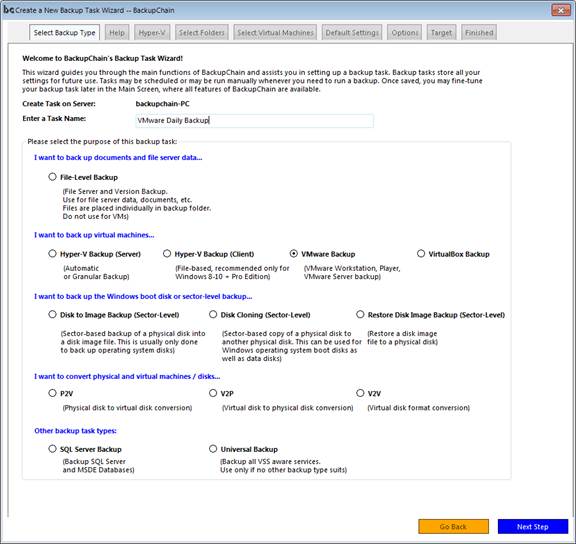
Create a new VMware Backup task by clicking New Task in the main screen. It’s recommended to create a VMware Backup task and use it only for VMware-related files:
In this example, we back up a Windows Server 2008 R2 virtual machine, located in C:\VmwareWorkstation. The folder has the following sample contents:
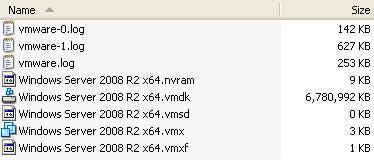
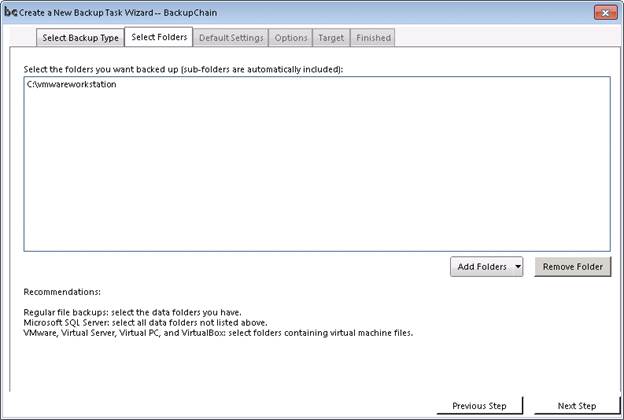
We select that folder for backup. Note that you can only back up live virtual machines when they are stored locally. Live backups do not work over the network. Offline backups do work over the network, however.
If you don’t know which folders are used by a particular VM, simply check the virtual disk setting for the VM in VMware. There you will find the path to the VMDK file, which is where all other VM-related files are also stored. In our example below, it is c:\VMwareWorkstation, and all our VMs in subfolders, which are included automatically:
We then accept the default settings in the following screens and select a backup target. See previous chapters for more information on backup options.
The task is now complete and can be started. You can set the schedule and edit other configurations later once the task is saved.
Restore of VMware Virtual Machines
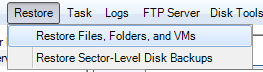
Follow the steps below to restore a VMware virtual machine. Select Restore Files, Folders, and VMs from the main menu:
Then you need to fill in the details about the backup location. This information is usually preset with the task settings:
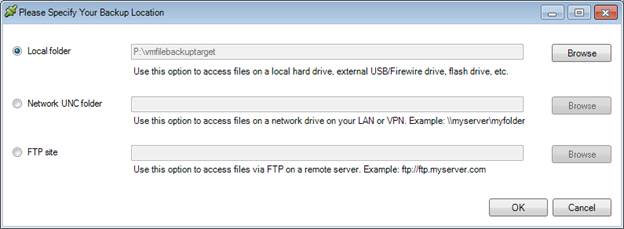
Note: You need to select the root folder in this step.
If you open the folder in Windows Explorer, the root folder may look like this:
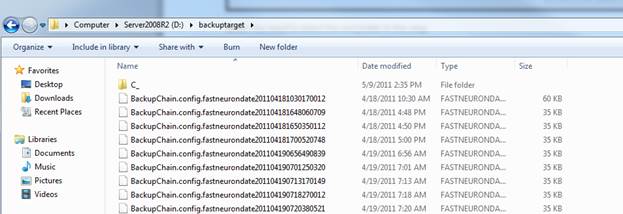
Notice the C_ folder (for C: drive) and the BackupChain.config files. These files are necessary for restore operations.
Proceed and select a Restore Point. Select a date from the calendar and the list of backups taken on that day will be shown underneath. Select the backup time and click Proceed. Alternatively select “I do not know when the data was backed up” to obtain the ‘full’ view of all available backups at the same time.
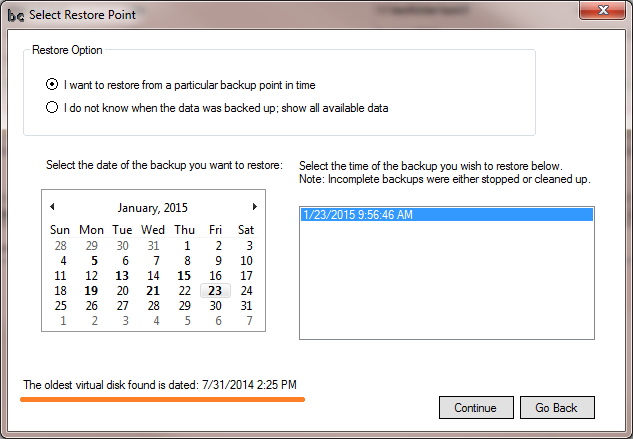
Note that BackupChain will scan in the background all available restore points. It will look for the oldest virtual disk that is available and display the date (see above in orange). Depending on your backup settings, there may be restorable backups from before that, but the date displayed, once the scan is complete, shows the backup date of the oldest virtual disk found, which is the oldest fully restorable backup.
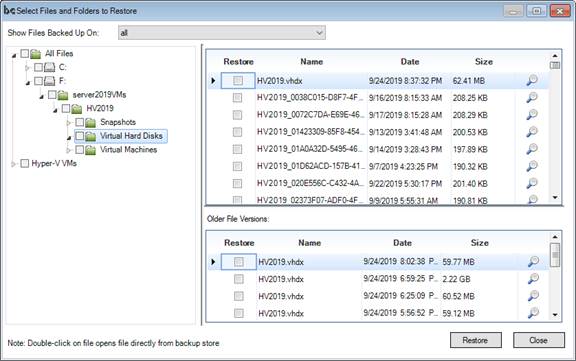
Now the Restore Screen opens:
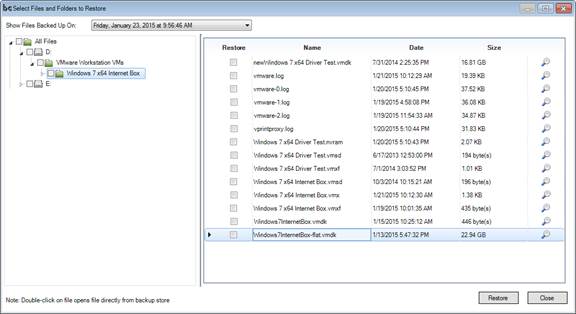
In order to restore all the files related to a virtual machine (their latest version), select the folder in the tree to the left and do not select any files. (“D:\VMware Workstation VMs\Windows 7 x64 Internet Box” in example above).
If you want to restore an earlier version of a VMDK file, click on the VMDK file as shown above, and the screen splits in half. The bottom half now shows all old versions of the VMDK file. To restore an old version, do not select the file at the top, select only one file from the bottom list. Then click the Restore button to proceed. If older file versions are present, the screen looks like this, note the file “HV2019.VHDX” is selected at the top and its older file versions appear at the bottom:
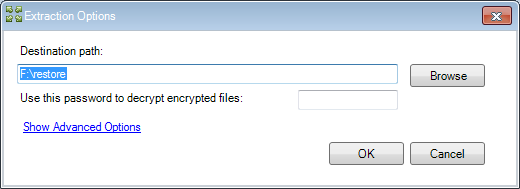
To proceed after clicking “Restore” simply enter a path where you want the restored files to be stored. You can always move them elsewhere from there. Note that a UNC path may also be entered here if necessary.
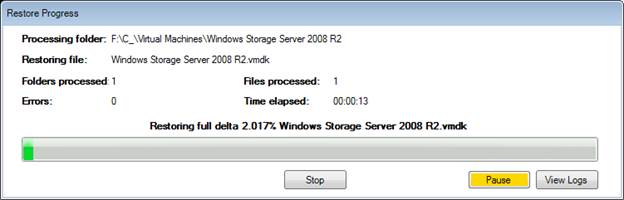
Proceed with the restore and wait until finished:
Then use Windows Explorer and navigate to the VMX file of the virtual machine you restored. VMware will then ask whether you moved or copied the VM:
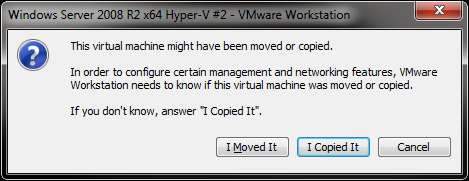
By answering “I moved it” you make VMware aware of the VM’s new location. Then power up the VM and your restore is complete! “I copied it” will assign a new hardware ID to the VM. Use the latter only if you are restoring the VM side-by-side for testing along with the original VM.
Note: When powering up a restored VM, If you receive a “Windows has not been shut down correctly” it’s because the “booted” flag hasn’t been cleared from the hard disk image. Be assured that the VM is in good condition.
Cold VMware Backups
Cold VMware backups are also possible. You can shut down the virtual machine before backup and then restart it. Some users prefer this method or create some backups cold and some live. You could set up several backup tasks to automate the process.
VMware provides the utility “vmrun.exe”, refer to VMware’s documentation for more information.
You could invoke VMware’s vmrun.exe as External Utility in BackupChain’s Options tab.
Run this command when the backup starts:
C:\path-to-vmware\vmrun.exe stop “C:\path-to-vm\myvm.vmx”
Run this command when the backup ends:
C:\path-to-vmware\vmrun.exe start “C:\path-to-vm\myvm.vmx”
In both cases you would want to use the option to wait until the program finishes.
Backup Software Overview
The Best Backup Software in 2026 Download BackupChain®BackupChain Backup Software is the all-in-one Windows Server backup solution and includes:
Server Backup
Disk Image Backup
Drive Cloning and Disk Copy
VirtualBox Backup
VMware Backup
FTP Backup
Cloud Backup
File Server Backup
Virtual Machine Backup
Server Backup Solution
Hyper-V Backup
Popular
- Best Practices for Server Backups
- NAS Backup: Buffalo, Drobo, Synology
- How to use BackupChain for Cloud and Remote
- DriveMaker: Map FTP, SFTP, S3 Sites to a Drive Letter (Freeware)
Resources
- BackupChain
- VM Backup
- Knowledge Base
- BackupChain (German)
- German Help Pages
- BackupChain (Greek)
- BackupChain (Spanish)
- BackupChain (French)
- BackupChain (Dutch)
- BackupChain (Italian)
- BackupChain Server Backup Solution
- BackupChain is an all-in-one, reliable backup solution for Windows and Hyper-V that is more affordable than Veeam, Acronis, and Altaro.